Thursday, October 17, 2013

Halloween Candied Caramel Corn

Last year I made these Halloween treat bags filled with candied popcorn. (Melt candy melts, pour over popcorn, stir and let set....easy and yummy!) The treat tags use clip art by my fabulously talented daughter. You can download them here for free in my teacherspayteachers store. 
This year, I took this favorite to another level by combining caramel corn with the candy melts. I got the idea from some expensive "Zebra" popcorn we bought that had chocolate and white chocolate drizzled on caramel corn. We actually like this just as well as the commercial kind. 
First, make your caramel corn. Here's a tried and true recipe:
15 cups popped popcorn
1 cup packed brown sugar
1/2 cup butter
1/4 cup corn syrup
1/2 tsp. salt
1/2 tsp. baking soda
Cook brown sugar, butter and corn syrup in a saucepan over medium heat until it bubbles around the edges. Cook and stir for five minutes. Remove from heat and stir in baking soda. Pour over the popcorn and stir. If you like chewy caramel corn, stop here. If you like it crispier (more Cracker Jack-like), bake on sheets in the oven at 200 degrees for up to an hour, stirring every 15 minutes or so. ( I bake it for about 20 minutes).
 
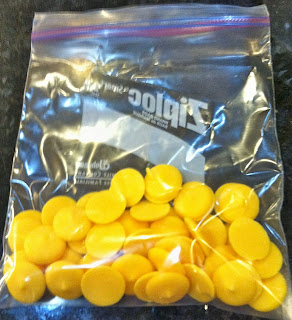
 Place about half a bag of Candy Melts in a plastic bag and microwave for 20 seconds. Take the bag out and mush around. Microwave 15 seconds at a time until just melted. Squish the bag around to make sure the candy is liquid. Clip off a tiny corner of the bag and squeeze over caramel corn.


 Stir the popcorn lightly and let it cool completely. Seal in plastic bags.

Monday, October 14, 2013

Easy Crocheted Baby Blanket


What's a grandma to do while waiting for a new grandbaby? Make something, of course. This one went camping with me, got stuffed into my school bag in case I had time between classes, and left in the backseat of my car on the day I did a triathlon in case I was there early enough and needed to calm my nerves. I had an overtime load of classes as the due date approached, but I finished it the day before Cooper was born (a week past his due date). That pattern was super simple so I could pick it up any time and start right where I left off without thinking, but I thought it was a really beautiful design. Here is the booklet where I found the instructions.

It took one jumbo skein of lightweight yarn and a size 5 mm (H8) hook. The basic pattern is a shell with five double crochets each, with a single double crochet in between each shell. I plan on making this one again. The pattern is called "first baby blanket," but it's a generous size, so it will be useful into the toddler years.


Tuesday, October 8, 2013

Cooper is here!

 Actually, he's been here for a week, but here are the pictures of the happy parents and Lance and I visiting a day later. Hailee and Chris have a lot of family, so there is a lot of love and care surrounding them and this little guy. I'm very grateful to them for allowing me to be a part of this wonderful circle and have a grandparenting role in baby Cooper's life.
 Could there be a happier grandpa?
There's no describing this feeling.

Saturday, June 22, 2013

First Birthday Cake Shortcuts

 When I make wedding cakes, perfectly even layers and perfectly smooth icing are worth spending hours to achieve. For my grandson's first birthday cake, however, I cut some corners, and when the cake was all done, it showed. My perfectionist self wasn't thrilled with the lopsided, leaning tower result. How could I remedy the situation without essentially starting over? Curling ribbon! You can barely tell that the layers are leaning to one side because the ribbon is a distraction.

I curled the ribbon in long lengths and taped the ends to a skewer, which I inserted behind the candle (which is also leaning, but that's another problem). I think it added some fun to the cake, too, so I might do this again, even with a  non-leaning cake.

I also saved some time shopping for a "1" candle. I didn't want to drive around to different stores, so I bought the only one in the store, which had a yellow outline and looked kind of weak against the bright blue and orange on the cake. I saved it by piping blue icing around the edge.

I had planned on piping dots all over the cake, but while I was standing in line, I saw these candy buttons and candy spots at the checkout line, and immediately recognized their time-saving value. I was a little worried the color might bleed, so I stuck a few in some icing and left it for a couple of hours to be safe. I was so happy when there was no bleeding. Sticking these babies on the sides of the cake was so much easier and neater than mixing icing colors and piping the dots.

Of course the end result didn't matter to Ryan. He decided it was better to smear it on himself and the balloons instead of eating it. He is mad in this picture because people were trying to get him to eat it instead of play with it. I didn't mind one bit. On your birthday, you get to do what you want! Happy Birthday, baby!

Monday, May 27, 2013

Baby Pool Summer Fun

 Baby who loves water + baby pool + hot day on a shade patio + toys from the dollar store = Fun! Some things never get old or outdated. Check out these funny squid dive toys from the Dollar Tree. Of course Ryan's favorite toy was a plastic tupperware container (had to keep him from using it to drink all the water, though).
When I was pregnant with Ryan's dad, Andrew, we lived in student housing with no air conditioning, and it was an unusually hot summer. Since Brennyn's favorite thing was the campus pool (with no shallow end, so she learned to swim fast and well) I donned my hugely unflattering maternity suit, and that's where we spent the summer. These kids have chlorine in their blood.

Saturday, May 18, 2013

Green Bean Casserole 2.0

I'm usually too much of a food snob to admit to liking anything with a cream of mushroom soup base, but I do I love the ubiquitous Thanksgiving green bean casserole. I also love fresh green beans, but my son, who eats at my house frequently, doesn't care for them (and I give him a pass, because he eats everything else on the planet). I noticed that him eating the casserole on Thanksgiving, though, and enjoying it. So I set out to find a better version, one I could use in the summer with the abundant fresh green beans, and wouldn't feel so heavy. After a little trial and error, and adjusting of existing recipes, here it is. Bonus: you can make it in a slow cooker. Try it out on your green bean hater. Mine loved it!

Green Bean Casserole 2.0
 1 lb. fresh green beans
1 can cream of mushroom soup
1 cup french-fried onion rings
1/2 cup grated cheddar cheese
1 can (8 ounces) water chestnuts, sliced
1/4 cup water
1/8 tsp. black pepper

Layer half the ingredients in a slow cooker, then repeat. Cook on high for about 3 hours or low for about 5 hours. 

Saturday, March 30, 2013

Easter Nest Treats


These easter nests are made from those dried chow mein noodles that you probably haven't had since the early 1980s. When I went looking for these a few years back, I was surprised they were still around. It brought back some bad memories of childhood canned chow mein dinners, but at least these were the tasty part of those convenience dinners gone awry.
There are a lot of recipes with different variations of easter nest treats, but the best recipe, by far, is the one adapted by my sister from a twenty-year-old recipe. Here is a link to her blog with a better picture of the nests. The only thing I changed from her version is that I used chunky peanut butter instead of creamy, and I always make these with Cadbury chocolate eggs. As much as I love jelly beans, they just don't work as well with this recipe.

 
Melt 1/4 cup butter and 4 1/2 cups (1 bag) of mini marshmallows over medium heat, stirring until smooth. Stir in 1/4 cup peanut butter and 1/2 cup semi-sweet chocolate chips until melted.
 Remove from heat and stir in 4 cups of the chow mein noodles. When you stir this up, it's going to look like something went wrong. It'll be all sticky and stringy, but don't worry, it will be fine.

Dip your hands in cold water to prevent the stickies and make 18 nests on waxed paper. Leave an indentation in the middle large enough to place two or three of the Cadbury eggs. That's it! Easy and delicious.